Every large organization that has extranet presence and that employed Oracle Identity Management 11.1.1.3 would like to organize their LDAP directory structures differently. This post provides an overview of how this can be achieved. For more details, please contact us at info@thekpsoft.com. The configuration varies based on a cluster or single server infrastructure, and how relevant access managers are laid out. This post focuses primarily on the underlying OID/OVD configuration and their linkages to OAM/OIM. what we have is two oams, two oims, single oid all replicated in a weblogic cluster (two each).
1. Create another OVD using opmnctl createcomponent -componentName ovd3 -componentType OVD -admin cn=orcladmin -isAdminSSL true -ovdAdminPort 8900 -namespace dc=acme,dc=com -ldapPort 2389 -ldapSport 2636
2. Create another OVD using opmnctl createcomponent -componentName ovd4 -componentType OVD -admin cn=orcladmin -isAdminSSL true -ovdAdminPort 8901 -namespace dc=acme,dc=com -ldapPort 3389 -ldapSport 3636
3. Create another OVD using opmnctl createcomponent -componentName ovd5 -componentType OVD -admin cn=orcladmin -isAdminSSL true -ovdAdminPort 8900 -namespace dc=acme,dc=com -ldapPort 2389 -ldapSport 2636
4. Create another OVD using opmnctl createcomponent -componentName ovd6 -componentType OVD -admin cn=orcladmin -isAdminSSL true -ovdAdminPort 8900 -namespace dc=acme,dc=com -ldapPort 3389 -ldapSport 2636
4. Create cn=external, cn=users,dc=acme,dc=com
5. Create cn=internal, cn=users,dc=acme,dc=com
6. Create cn=system, cn=users,dc=acme,dc=com
7. Using ldif scripts create oamadmin2, xelsysadm2, and weblogic2 in system container, Add respective roles in OID and OIM.
8. Create the following Adapters in the OVD3 with
a. User Adapter with remotebase and root as cn=external, cn=users,dc=acme,dc=com
b. User Adapter with remotebase and root as cn=system, cn=users,dc=acme,dc=com
c. User Adapter with remotebase and root as cn=Groups,dc=acme,dc=com
d. For each user adapter plugin set oamenableflag=true
9. Create the following Adapters in the OVD4 with
a. User Adapter with remotebase and root as cn=internal, cn=users,dc=acme,dc=com
b. User Adapter with remotebase and root as cn=system, cn=users,dc=acme,dc=com
c. User Adapter with remotebase and root as cn=Groups,dc=acme,dc=com
d. For each user adapter plugin set oamenableflag=true
e. please note that in case internal adapter is linked to AD, difference plug-in configuration will be required.
10. Create the following Adapters in the OVD5 and OVD6 with
a. User Adapter with remotebase and root as cn=users,dc=acme,dc=com
b. Change Log Adapter with remotebase and root as cn=changelog10. log into weblogic console,
a. navigate to security realms, myrealm, providers
b. add two OVD3 and ovd4 authenticators
c. make sure the order is changed and these should be above the original ovd authenticator
11. Login to each OIM as xelsysadm
a. Click advanced
b. select manage it resource
c. search for Directory Server and change the port number on OIM1 to 2389 and the second one to 3389
12. Login to OAM1 and make ovd3 as primary user store
13. Login to OAM2 and make OVD4 as primary user store
Wednesday, October 5, 2011
BI Publisher Integration with Oracle OIM 11g
Introduction
Oracle BI Publisher 11.1.1.3 is used to build the reports for ’s OIM environment. Primary schemas that are used for gathering data are Dev_IAU (audit DB) and Dev_OIM. Audit DB data collection steps will be captured in a separate post. Reports are developed using Oracle BI Publisher plugin for MS Word. Oracle OIM 11.1.1.3 software provides several out-of-the-box reports, these reports are built for Oracle BI Publisher 10.1.3 environment. After running an upgrade utility some reports appear to work, but overall the upgraded reports and the underlying XML documents (xdms, xdos) are corrupt. Reports that are mentioned in this post have been re-created using the same underlying data model and associated queries.
BI Weblogic Admin Server’s Security Realm Configuration


Adding users to BI Consumer Role in Weblogic EM


Creation of Data Sources in BI Weblogic Servers


Adding Data Sources to BI Consumer Role

Uploading of Reports
Click Administration -> Server configuration -> check the ‘Path’ value under Catalog

Adding Permissions for Reports and Relevant Data Models

Oracle BI Publisher 11.1.1.3 is used to build the reports for ’s OIM environment. Primary schemas that are used for gathering data are Dev_IAU (audit DB) and Dev_OIM. Audit DB data collection steps will be captured in a separate post. Reports are developed using Oracle BI Publisher plugin for MS Word. Oracle OIM 11.1.1.3 software provides several out-of-the-box reports, these reports are built for Oracle BI Publisher 10.1.3 environment. After running an upgrade utility some reports appear to work, but overall the upgraded reports and the underlying XML documents (xdms, xdos) are corrupt. Reports that are mentioned in this post have been re-created using the same underlying data model and associated queries.
| Reports Name | Description |
User Reports | |
User Authentication Summary | User Login, Logout Information |
User Summary | Key elements of a user account profile (first name, last name etc) |
Users Deleted | User detail that is deleted by date |
Users Disabled | User detail that is disabled by date |
Users Unlocked | User detail that is unlocked by date |
Password Reports | |
Password Expiration Summary | User account password expiration summary |
Password Reset Summary | User account password resets summary |
Role and Organization Reports | |
Organization Details | Organization name, creation date |
Role Membership History | Role membership information |
Role Membership Profile | Role membership information |
Role Membership | Role membership information |
User Membership History | Users grouped by role information |
BI Weblogic Admin Server’s Security Realm Configuration
1. Take a copy of config.xml in /share/orabi/admin/BIDomain/aserver/bifoundation_domain/config folder
2. Login using BI weblogic console as weblogic user (or with similar privileges).
3. Navigate to security realms -> my realm -> Providers tab

4. Create and order the providers (OAMIdentityAsserter, OVDAuthenticator, DefaultAuthenticator, DefaultIdentityAsserter) as shown in the graphic above. (note: creation of the security providers is out-of-scope for this document).
1. Login to OIM as xelsysadm user. -> click Administration -> click Create User Icon and create a BISystemUser as shown in the graphic below:

2. Logout as xelsysadm and login as the user that was just created to reset the first password and answer security challenge questions.
2. Login to qa-oim1 linux box as orabi, cd to /home/orabi/oracle/middleware/wlserver_10.3/common/bin
3. Run ‘wlst.sh’ program
4. Enter the following at the shell prompt - connect ('weblogic', 'iamq$1', 't3://<hostname.domain>:7031')
5. Run the following commands (replace password below with the most recent password set above):
a. listCred(map="oracle.bi.system",key="system.user")
b. deleteCred(map="oracle.bi.system",key="system.user")
c. createCred(map="oracle.bi.system",key="system.user", user="BISystemUser", password="Welcome_2")
Adding users to BI Consumer Role in Weblogic EM
2. Navigate to ‘Weblogic Domain’ -> bifoundation_domain
3. Right mouse click on bifoundation_domain and select security -> Application Roles
4. Under Search subsection -> Select application Stripe to Search radio buttong and select obi from the drop-down selection list as shown in the graphic below:

1. Click Search beside the Role Name and select BIConsumer

1. Click Add User and search for users for whom you would like give report read access to. For example in the screen above, RT2@abc.com (another OIM user in the MPR repository) is added to the BIConsumer role.
Creation of Data Sources in BI Weblogic Servers
1. Login to http://<hostname.domain>:9714/xmlpserver/ as weblogic -> click administration as shown below:

1. Click jdbc -> data sources -> Add Data source and create a data source call oimReportsDS as shown below

1. Repeat the same and create OIM JDBC data source
Adding Data Sources to BI Consumer Role
1. Navigate to Administration -> Security Center -> Roles and Permissions

1. Click BIConsumer -> Add OIM JDBC and oimReportsDS role from available data sources to Allowed data sources and click Apply.
Uploading of Reports
1. Login to qa-oim1 and FTP all the reports (xdo and xdm folders) to the following directory (/home/orabi/admin/BIDomain/aserver/bifoundation_domain/config/bipublisher/repository/Reports)
2. The folder location can be found using steps below:
Click Administration -> Server configuration -> check the ‘Path’ value under Catalog

Adding Permissions for Reports and Relevant Data Models
2. Click Catalog and select report folders in the left menu
3. Select each folder and do the following for each:
a. Select more under each report and click permissions

b. Click + sign to add BIConsumer roleand select read, wirte, Run Report Online, View report online checkboxes and click ok
c. Perform the same for relevant data model element and select the options as above.
d. Login as user with BIConsumer roles and you should be able to access reports.
Wednesday, June 29, 2011
Hudson - Sonar - Continuous Integration in Minutes
Versions of software that were used for this exercise include:
· Maven – 3.0.3
· Apache Ant – 1.8.2 (the project that I am working on all still use ANT, thus focusing on ant)
· Apache Tomcat – 6.0.32
· JDK – 1.6.0_25
· Hudson – 2.0.1
· Sonar – 2.8
· MySQL – 5.5.13
* where possible I used war file option, this way all my key software deployments are in one place and easy to debug when issues arise.
References that I used:
1. Install My SQL using mysql-5.5.13-wind32.msi


3. I selected all default options for this installation and chose my admin username and password as admin/admin
4. Installed apache-tomcat at C: drive as C:\apache-tomcat-6.0.32 and link to JRE/JDK 1.6.0_25
5. Installed maven at C: drive as C:\apache-maven-3.0.3
6. Installed ant at C: drive as C:\apache-ant-1.8.2
7. Installed sonar-2.8.zip at C:\My Downloads\sonar and extracted all the files
8. Update sonar.properties under C:\My Downloads\sonar\sonar-2.8\sonar-2.8\conf folder to link it to MySQL (make sure the url works before you put it here)
a. sonar.jdbc.url: jdbc:mysql://localhost:3306/sonar?useUnicode=true&characterEncoding=utf8
b. sonar.jdbc.driverClassName: com.mysql.jdbc.Driver
c. sonar.jdbc.validationQuery: select 1
9. Run mysql.exe –u root < C:\My Downloads\sonar\sonar-2.8\sonar-2.8\extras\database\mysql\create_database.sql
10. Navigate to C:\My Downloads\sonar\sonar-2.8\sonar-2.8\war and run build-war.bat
11. Copied sonar war file from war folder to the C:\apache-tomcat-6.0.32\webapps directory
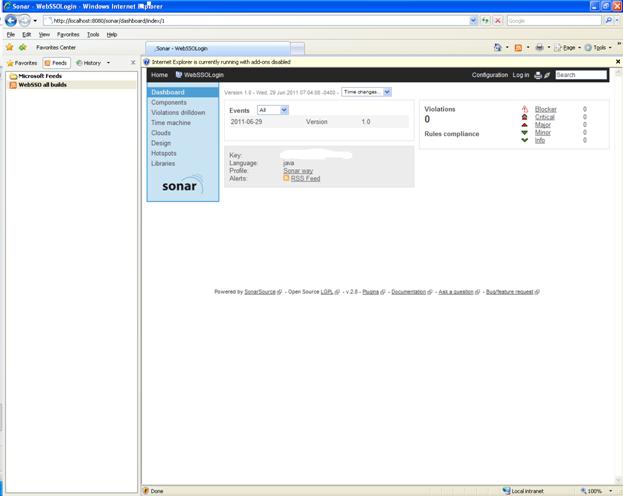
12. Start tomcat and access sonar at http://localhost:8080/sonar
a. This will also execute DDL and create tables in mysql sonar db
13. Login and admin/admin and click configuration to configure various settings (checkstyle, google analytics etc…)
14.

14.

15. Download hudson-2.0.1.zip and rename it as Hudson-2.0.1.war and copy it to C:\apache-tomcat-6.0.32\webapps (if you get a perm gc or other java memory errors) set CATALINA_OPTS=”-Xmx512m”
16. Before you restart Apache tomcat set the following variables as well:
a. Set ANT_HOME= C:\apache-ant-1.8.2
b. Set MAVEN_HOME= C:\apache-maven-3.0.3
c. set PATH=%ANT_HOME%\bin;%MAVE_HOME%\bin;%PATH%
17. Restart Apache Tomcat
18. Login to Hudson at http://localhost:8080/hudson/
19. Click Manage Hudson and Manage Plugins
 20.
20.

21. Click available sub tab
22. Scroll drown and select check box against Hudson sonar Plugin and click install at bottom right corner (scroll to the end and down if necessary)
23. Navigate back to Hudson main page and click manage Hudson
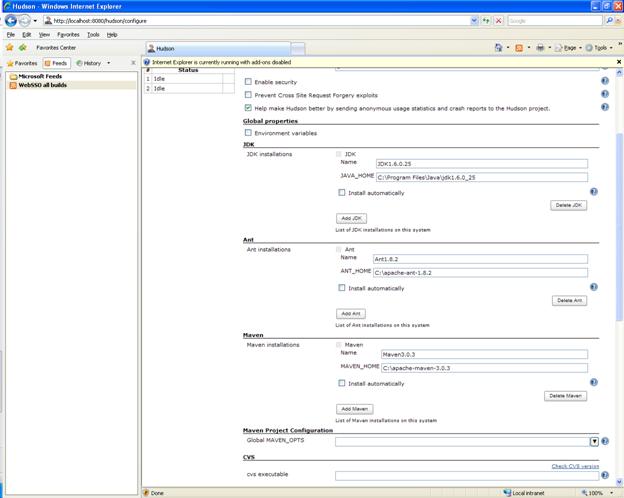
24. Select configure system
25. Add JDK, ANT, MAVEN configurations as shown below
 26.
26.
27. Add sub version or cvs source code repository if available (url, username and password and make sure they are saved)
28. Under sonar installations click “Add Sonar” button and add the configurations as shown below, make sure database url and server url works.
29.

29.

30. Create new project (with link to SVN, I removed SVN url for privacy purposes here, but this works J )
31.
31.
32. Add Invoke Ant Build (since the projects don’t use maven yet, but this is still in works at the time of generation of this article)
33.

33.

34. Click Save
35. Click Build Now
36.

36.

37. Click on Build History link that is generated for every build and click on console to monitor the job progress or errors and take corrective actions if any that may be needed.
38. Once the build is done, the code coverage results will be published to sonar directly at
Subscribe to:
Comments (Atom)